Yesterday I made a small photo excursion to my home town castle ruins because we have some big festivities there at the moment. The weather was faboulos, so i decided to do some HDRs, including some of our old carousel that is being put up for the week. Due to the number of people (and quirks of photomatix) I had to do a lot of work after making the HDR, that I thought might be interesting for beginners in the HDR area.
I started out with these three images (shot handheld):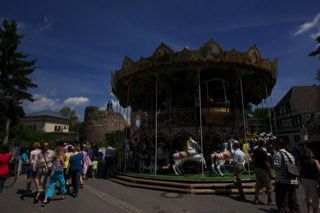
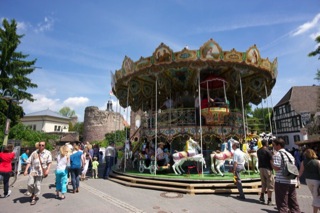
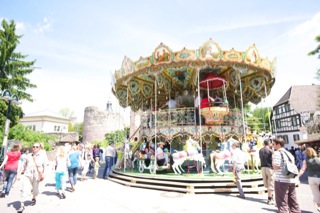
Like you would expect, the sky is the best in the -2 shot, he people and the ruins in the background look best in the normal exposure photo and the details of the carousel look best in the +2 shot since they are in the shadow due to the roof of the carousel.
Since I had handheld the shots, I decided to use the HDR function of Photoshop 3, which I mainly use for overlaying the images and then used the Photomatix Tone Mapping plugin on the image Photoshop supplied. The result looked like this: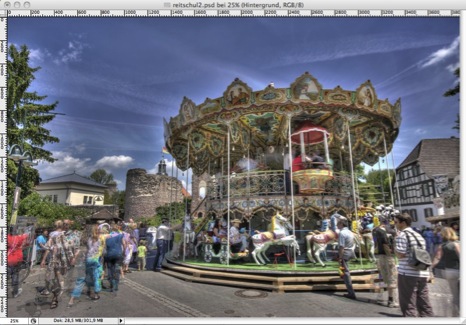
There was A LOT of ghosting since people were moving around and one part of the carousel revolves around itself, so that had been in movement, too – and the noise in the carousel was awful as well, so I decided to do some cleaning of the photo using the lighter two exposures. I added them as layers in Photoshop and aligned them with the tonemapped image so that I could paint in parts of those layers using layer masks. Since I knew I needed several areas of each photo, I decided to keep the original layers untouched and simply duplicate them for the cloning. This has the bonus that you don’t have to mess with your old layer mask when adding a new layer.
As a first step, I decided to get rid of the ghosting of the people in the foreground (all the moving parts etc. are referred to as ghosting) so I duplicated the normal exposure layer and added a black layer mask and used a soft edge brush to reveal the parts of the layer I wanted to use for the people. The result looked like this: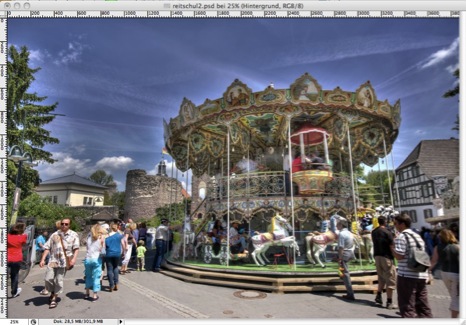
Unfortunately the stone ground lost some of its texture but the people look ley they are supposed to and the foreground looks way less busy, even though there are sill a ton of people. If you look closely, you can see that there were people moving in the carousel as well, so those had to be replaced, too. For this I decided to use the +2 layer, since I wanted the people (and even more the paintings) to be visible. So I duplicated that layer and worked with a layer mask again to paint in the non-moving people, which improves the picture again: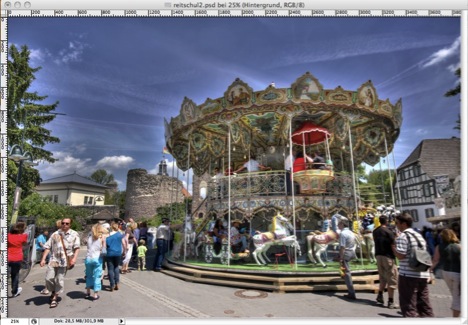
Since you can’t really see it from the zoomed out photo, I did a zoom into the area where most people were standing & moving. This is after cleaning up this part of the image.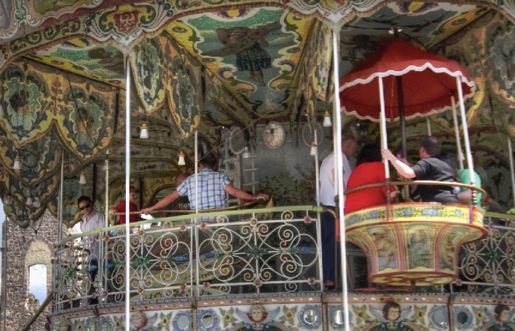
As you can see, the people are clearly visible now but the paint job looks like it has been out in the weather for decades because the noise is soo bad. This is mainly due to Photomatix, which introduced a lot of noise into your photo. So you should sometimes clean up very dark or very light areas to get a more even look – and less noise. For this I used the +2 layer, too, since that one had the most details for the paintings.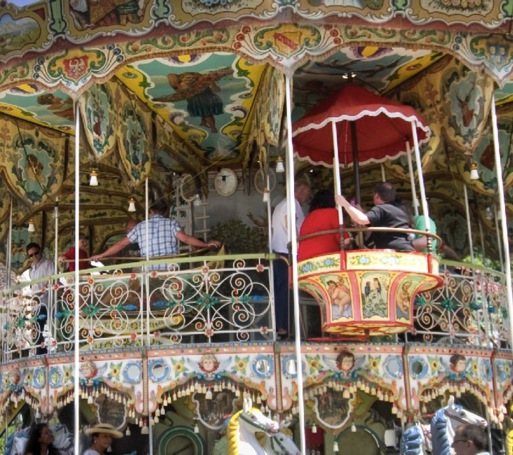
I think the difference in the zoomed in images speaks for itself, doesn’t it? Here is how it looks like zoomed out: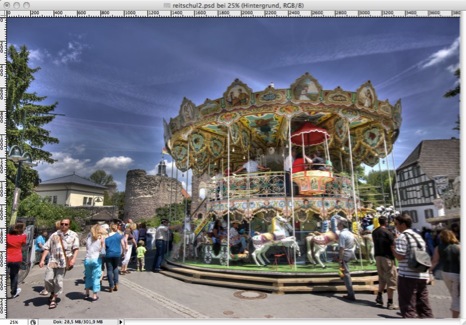
A lot more details are visible now in the paint job but the trimming on the roof was too dark, so i painted it in from the normal exposure photo to get an even look and, since it is its own layer, I was able to increase the brightness a bit of just that layer to match the overall brightness of the carousel.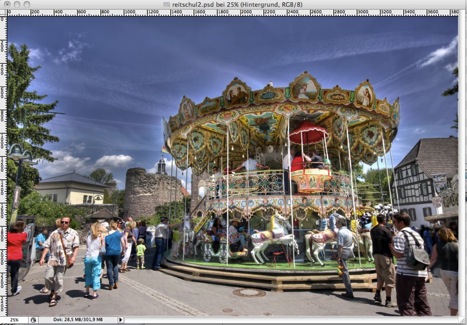
As a last step, I cleaned up the lower floor and the horses on it, using the normal exposure photo to get to the final image: (Links to Flickr where you can find a larger size)
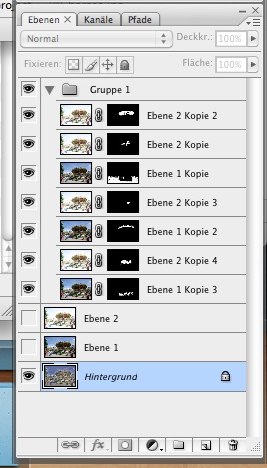 Here is also a look at the different layers I ended up with for the final image): The Cleanup took longer than I usually take the time for my images but I think the results are clearly worth it. I hope this little guide helped you see how some little cleaning up can improve a HDR image. If you have questions – hit the comments!


