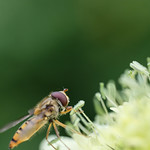
Some weeks ago I visited the local botanical gargen in Frankfurt, Germany. As you can probably guess, I had a blast with my Macro lens. While I normally try to frame the picture directly in the camera as I want to have it, in the botanical garden that might now always be possible due to the fact that I couldn’t get as close to some flowers as I would have liked. But that is an are where those megapixels really come in handy – you can crop a picture without loosing much in terms of picture quality. Another thing you can do while you are cropping your picture is changing the composition in the picture – a flower you had in the middle of the frame can be positioned according to the rule of thirds, for example. You may be wondering how much difference this will make, well I’ve got an example for you 🙂
Here is the original picture I took (remember, clicking on the pic will show you a larger size):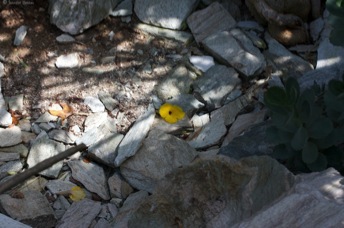
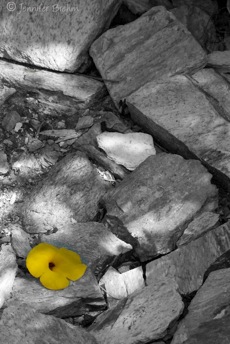
I really liked the idea of the bright flower on the stones but as you can see, the picture is more of a mess than anything else due to the shadows and the flower doesn’t pop out of the picture even though it is such a bright yellow. As you might have already guessed, I once again decided to do a selective coloring version of this picture. (Yeah, I’m pretty hookedd on it right now.) 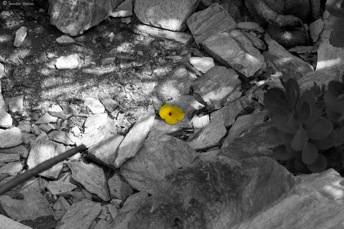
As you can see, the color palette didn’t dramatically change from one to the other picture but the shadows don’t stand out as much as they did in the color version and the flower draws much more attention than before. Even though this version really is a step up from the original, it’s still a long way from „wow“. I wanted to highlight the flower even more, so I decided to crop the photo a bit. When I began cropping the picture, I decied to play with the composition a bit, too, because the flower wasn’t directly in the middle of the frame in the original but I found it to be a bit bland when put in the middle. Additionally, the ground next to the flower is really different in different areas, so I decided to play with that a bit, too.
In the first version I decided to do a pretty tight crop of the flower and include only some of the stones that it was lying on. Additionally, with this crop the hardest shadows of the original aren’t part of the picture anymore – there are still some shadows left but they are not getting in the way of the picture. The flower is in the lower left corner, near the line that would seperate the middle and lower third of the photo.
Another version i did puts the flower in the lower right corner of the frame with having the stones only t the corners of the photo and using the sandy-ground with the very prominent shadows as an interest point in the picture. When you compare the two pictures, they are very different looking photographs and don’t look like they were made from the same, bland looking, original. But that’s the beauty of cropping, you can explore possibilities that you didn’t think of when you were out shooting or that wouldn’t have been possible during your shoot.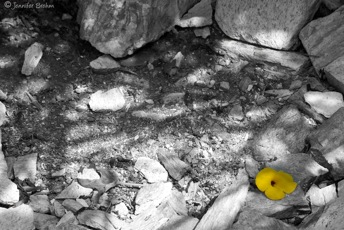
A third version I did is also a horizontal crop of the original photo. I put the flower in the lower left corner, similarly to the version in portrait-orientation. This time you can see the stones and the nearest flower, which I think is a good contrast to the yellow flower on the other side of the frame.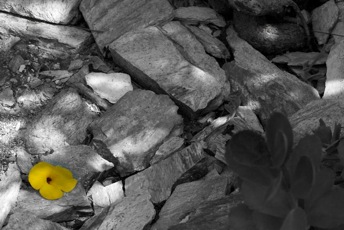
Even though I really like all three versions, I still haven’t figuered out which version I like best. All have their good and their bad points but I know one thing for sure: They do look a lot better than the original photo! I guess the morale of the story is that sometimes it is a good idea to play around with a picture even if the oriinal picture did not turn out as good as you hoped it would.
