Last week in my entry „make it POP“ I spoke about selective coloring as a way to make your subject stand out more. While browing my photos from the trip to the Berlin Zoo I saw another picture that I thought would benefit from selective coloring. As you can see (if you look closely), there is a reptile in that tree looking directly into the camera. The problem? Nobody will be able to see him hiding in that tree because he has the same coloring as the leaves around him! My first thought was to apply selective coloring to the picture using Photoshop in a hope to get him to stand out more.
Now you can see him a lot better but still he does not pop out of the frame like the grashopper did, now does he? At first I tried playing around with the black & white values in photoshop and with the saturation of the colored part but both didn’t really make too much of a different. So it was back to thinking…
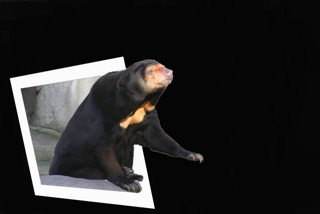
Luckily, I stumbled over a picture on Flickr where someone had used a pretty easy trick in Photoshop on his picture: Make a frame around your picture and let part of your subject hang out of the frame. i had done this previously to some shots when I first found a tutorial on this.

It’s a pretty easy technique but the results can be quite good if you have the right kind of picture, so I decided to do this with the shot from above, too. What you’ll have to do is: Open up the picture in Photoshop, duplicate the layer (just in case), then use the forms tool to make a frame the size you would like the outer limit to be, then add a second one inside the first to get your white frame (or any other color, of course). Now select the pixels of the smaller frame (control-click the layer or command-click on a Mac) and then click on the layer mask tool for the first layer, this will make the inner parts of the rectangle invisible, so that you see your photo again. Now position the frame to your liking, you can also transform the frame a bit if you want. Now you can do a multitude of different things (typically Photoshop, there are a lot ways to reach your goal). What I did was selecting the areas of the photo I wanted to have standing over the frame and copied those to a new layer. This way all you have to do afterwards is selecting the pixels of your frame and then reverse the selection and delete the now selected part of the working area from your photo. Now jus add a simple black layer underneath and you are done! A different technique without deleting would be to select the pixels of the frame, again reverse your selection and mask your photo layer with that and then just remove the parts of the mask that are on your overlapping areas and use the layer mask of the frame to let the parts of the photo be visible where it shall overlap the frame. (I hope you can make any sense from this short descritption… I also found an online tutorial that takes, again, another approach. You can find this tutorial here.
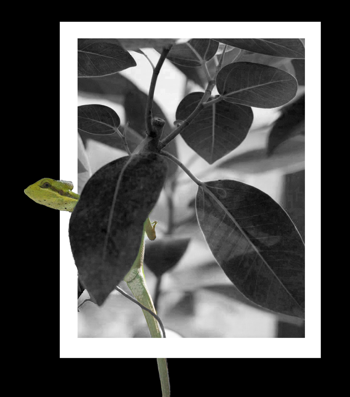
Now after so much talking, here is my version of the picture above:
As you can see, the little guy is a lot more visible than before. This way you can really appreciate the subject and do not have to spent eons searching for it. Especially on Flickr, where a lot of depends on the thumbnail views of your pictures, this version garners a lot more attention.
The morale of the story? Sometimes you have to get creative with your picture to make a shot you like be recognized as a beautiful shot.


