One of my favorite bloggers, Brian Auer, is doing another Photo Project. He asked users to send him photos they would be willing to share for another “Edit my Photo” contest. I wanted to participate in this part of the project – but of course, I forgot about it… But I did remember to vote on which photo should be used for the editing part of the project (You can find all entries here).
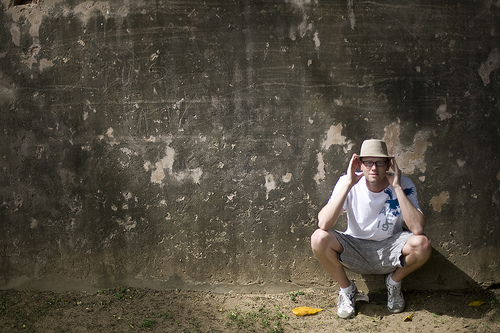
The winning entry by John Huson
I really liked the photo that got chosen, because I was drawn to the structure in the wall. I really wanted to focus on the wall for my entry for the project because I think it has a higher draw to it than the person pictured. Brian supplied me with the RAW version of the photo so I had a whole range of options at my disposal to play with the photo.
I started out by opening the photo in Photoshop CS3 and the Camera RAW editior. Next I tried the different outputs for changing the white balance. I decided to go with the results from the tungsten light, which gave the whole photo a nice blue tint.
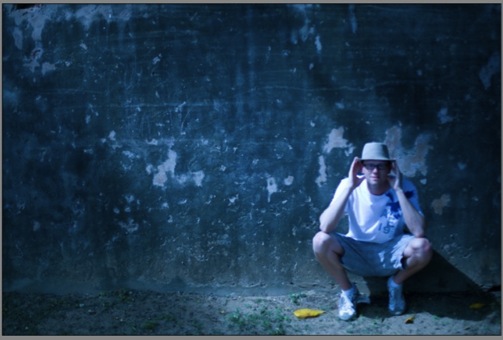
The photo with white balance set to tungsten light
Next I decided to use a Lomo action for Photoshop I had downloaded some time ago and had gotten really great results from in the past (You can find this photoshop action here).
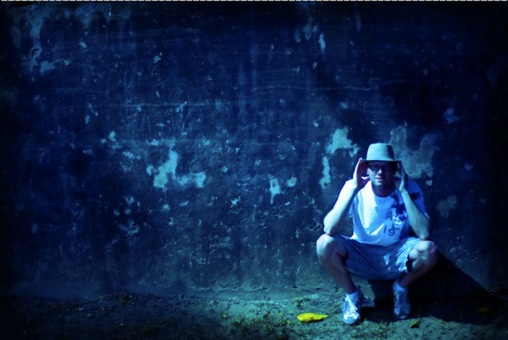
The photo with the Lomo action applied
I really liked the direction this was going and also how that yellow thingy on the ground was standing out of the photo but the guy in the photo had become too dark and the texture in the wall did not jump out at you, either. Due to this, I decided to keep playing with the photo.
My next idea was to make a new layer with the original photo on top of the lomo-rized version and try different blending modes. The one I decided on was “overlay”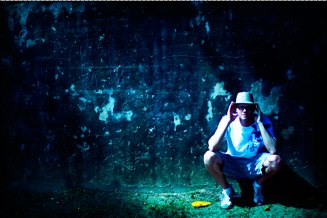
The guy in the photo is looking even worse but the wall had gotten a really nice texture. Now that I liked the wall, I decided to see what I could do to bring the guy in the picture back to a look where you can see his face. For this I made two additional layers on top with the original photo. In the lower one I used the masking tool and only left his face visible and used the blending mode “Lighten”, which brought back the details in his face but he still did not have enough contrast in comparison to the rest of the photo, so I selected the whole of him in the next layer and masked this and used Overlay again. This increase the contrasts in his clothes and his skin a lot. Lastly, I decided to use a curves adjustment layer and played around with it until I was satisfied. The result of this I liked to much, that I decided to enter it as my entry into the project:
My final edit
If you want to partcipate in the project, you can do so until October 16th 🙂