In my last blog post I hinted at a longer story coming forth about my problems with my scanner. Today is the day to write this down.
Years upon years ago, I bought a HP G4010, which has a backlight unit to scan 35mm negatives. At the time my only goal was to digitize some of the old images my family had taken before there was digital photography. For this it worked pretty good. Then I bought the Diana F+ and suddenly I needed a scanner that was able to scan those medium format film strips. I ended up getting the HP G4050 since I had liked the G4050. Since hindsight is 20/20: this was a mistake!
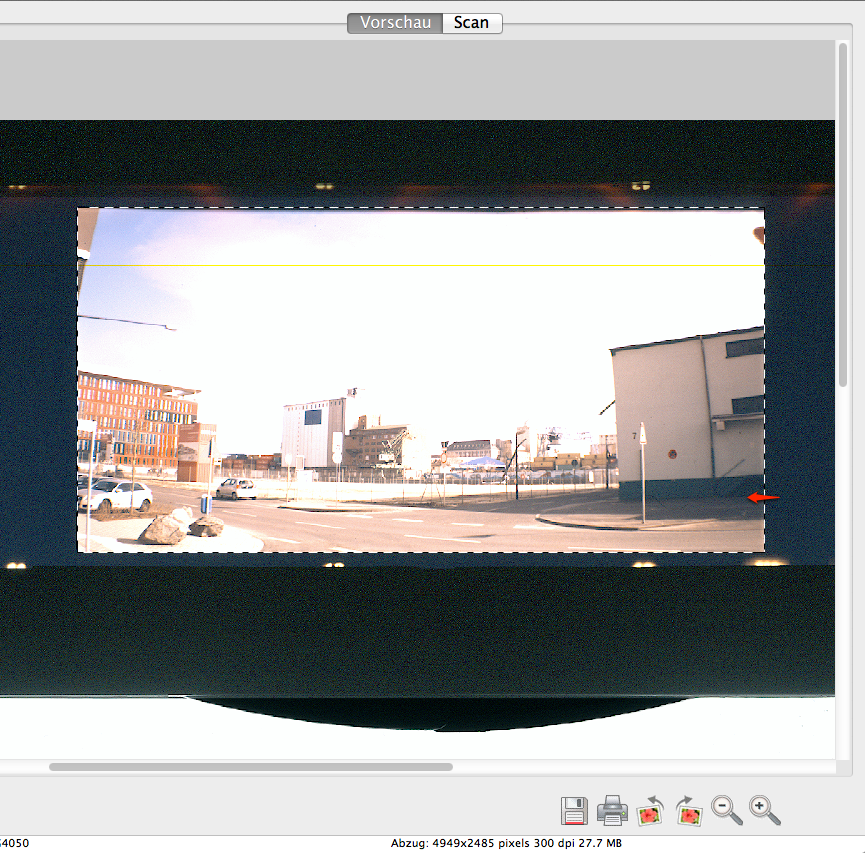
The G4050 has been around for a lot of years now and HP has updated the scan software it uses for all its scanners but the G4050 did not get the updated utility but stuck with the old one. In addition to that, I had trouble scanning with lines running cross my images (digital lines) a lot of the time. I got into contact with the support of HP, who offered to send me a replacement top part of the scanner so I could try if that would help. It got a bit better but I still got the lines most of the time when I used the Lomography Scan Holders instead of the ones the HP came with. In addition oftentimes it would preview color images as black and white or the colors where completely off. Basically anything that was more advanced than a ISO 200 or ISO 400 color negative film was beyond its capabilities (which is the film I am least likely to shoot…). These results, btw, were the same when using VueScan instead of the build in utility.

The final straw was a few weeks ago when I started scanning the first results from my Belair X6-12, a medium format camera. The first film was a ISO 200 (or 400, cannot remember) 120 slide film – meaning I saw the image itself already on the film strip, so I KNEW that the images had good exposure. The HP though only gave me completely blown out shots. I was able to get a bit better results using VueScan but still not ideal. In the end I put the film strip on my iPad on a white background and used my iPhone to share some results.
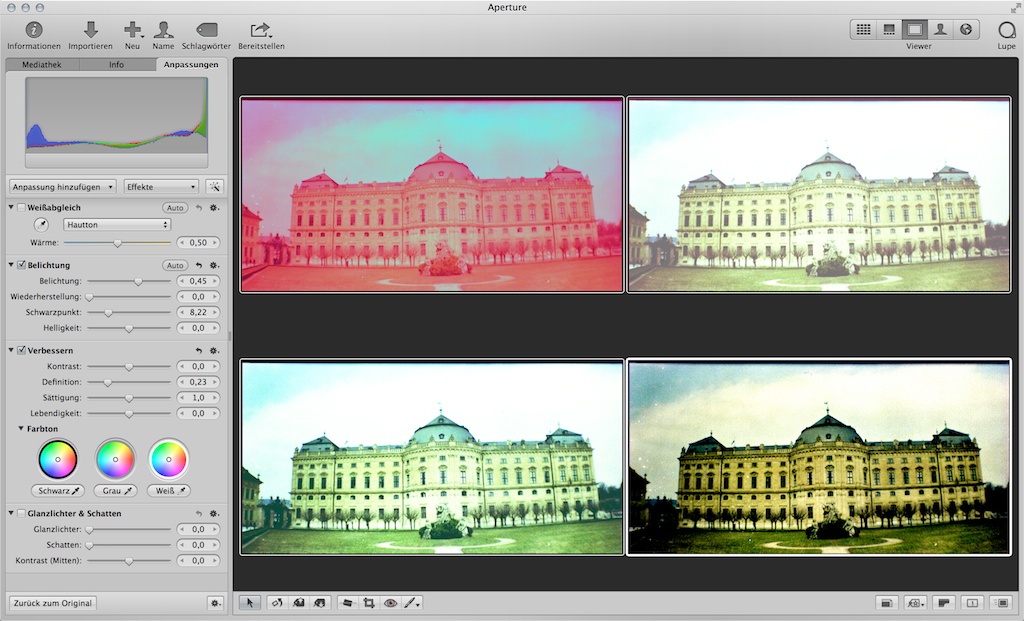
Then a few weeks later I shot a slide film and crossed it with it. In the end I spent about an hour in Photoshop on each image because the best i could do was take the raw image from vuescan and invert myself using photoshop and then using curves etc to clean up the colors.
If this sounds frustrating to you: welcome to my world. I have cursed more often at this device than I can imagine…
But not only did I get a Belair recently but Canon announced a new scanner. Scanners are notoriously slow to be updated (especially those which can scan film) so I was interested in this new one since it uses a LED backlight and can scan both 35mm and 120mm film and uses a new software utility Canon built from scratch for this scanner.
So after this last debacle with the HP, I decided to take the plunge and buy the Canon. It took a few weeks to arrive since my photo store had to order it for me but on Saturday I was able to pick it up and started testing it right away. At first I used VueScan (which has an update out that can utilize the Canon) but somehow I still have not fully grasped VueScan – but i got okay results already with it and the scanner was super quite and fast compared to the HP. Then I decided to install the scan utilities that came with the scanner and see how they work and I have to say: i am impressed. It has a lot of options for improving your results and is relatively easy to understand and use and the results turned out great in my opinion. Even the cross processed slide film worked right out the box with results that look like I imagined they might. All without shouting and cursing! (Images where I show two here, the HP is the first, the Canon the second, the HP ones have several hours of post-processing, the Canon ones have not been touched after scanning)


My next step now is to re-scan some of the films from the last two years to see if I can get better results. The Lomo scan masks, btw, work without a problem with it – meaning I can finally fully scan the sprocket holes!